In Excel one can easily convert data columns to rows or multiple data rows to columns which is technically named transpose.
And this actually shifts the dimensions of data and along with it definitely the address of different data bits will also change. Therefore, if you are into transposing your data, do it with caution as if you shift the data the dependent cells might miscalculate the figures.
Love reading about Excel? Subscribe my youtube channel dedicated to Excel.
Many already know how to do this. But for those who don’t this one minute Excel tutorial is for them. By the way, yes! you can use pivot tables to shift rows as columns. To learn how to make pivot tables read this readers’ favourite tutorial. And most probably you will figure out the way how rows are shifted as columns using pivot tables.
We have several ways to switch or rotate Excel data columns to rows or vice versa to accomplish this task. Following are the transpose methods we are discussing today in which few involve converting columns to rows using Excel formulas:
- Use Paste Special
- Use TRANSPOSE function
- Use INDIRECT function
- Use INDEX function
- Use Paste Special + Common Sense
Method 1: Convert columns to rows using Paste Special
Copying and Pasting is one great thing happened to PC. With Paste Special it really went miles ahead. In Excel you can copy a data and then using paste special functionality you can twist, rotate, manipulate, process and do other things with the data very easily including Transpose i.e. flipping columns to rows or rows to columns. To do this following steps will help:
Step 1: Select the data that you want to transpose and copy it using the copy button or with Ctrl+C shortcut.
Step 2: Go to the cell where you want the data to paste. And go to Home tab > clip board group > click the drop down button just under paste button > select:
- under paste sub-group click transpose button that comes with this icon; OR
- Select paste special. This will open the paste special dialogue from which check the transpose checkbox and click OK button
Your data will be transposed instantly. Told ya! it is easy!
Method 2: TRANSPOSE Function to switch columns to rows or vice versa
Yes there is a function that can do the somersault called TRANSPOSE. The use of this function is a little tricky and requires knowing more than pressing TAB so follow the steps closely.
IMPORTANT: Determine the rows and columns of your data. For example you have 2 columns and 7 rows. Once you transpose the data it will be 2 rows and 7 columns.
Step 1: Determine the rows and columns of data. In our case it is 7 rows and 2 columns
Step 2: Select a vacant region in the worksheet which is 2 rows deep and 7 columns wide.
Step 3: Press F2 key to enter edit mode while the region still selected.
Step 4: Write TRANSPOSE function following the equal sign and enter the data range that you want to transpose
Step 5: Hit CTRL+SHIFT+ENTER. Yes! Not just Enter key but Ctrl+Shift+Enter as this is an array formula
TANGO! Your data is transposed!
Benefit of TRANSPOSE Function
The best thing with using TRANSPOSE function is that if you change the values in the source range then transposed range will also change accordingly. So basically it is a live-transposed-range of the source-range.
But as this is an array function this is very much dependent on the source and if you try to change anything this tends to break. Therefore, even if it is good for many reasons, it is hard go by in many situations. So follow along to learn some more easier to go tricks to get the data transposed in Excel.
Method 3: TRANSPOSE Using INDIRECT function
INDIRECT function was introduced in one of my favourite article some time back in which we learned how to build a reference to worksheet based on cell value. I must confess that I used to think INDIRECT has very little use but this little function can prove tremendous help.
Today we will look at another use of INDIRECT function i.e. to transpose the data. However, if you use this function the treatment for column to row shift is a little different from row to column shift. So I will explain both one by one.
Transpose – Column to Row using INDIRECT
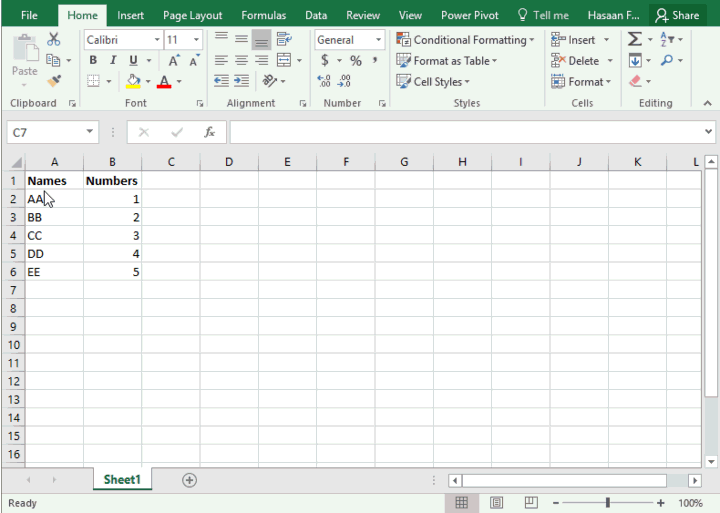
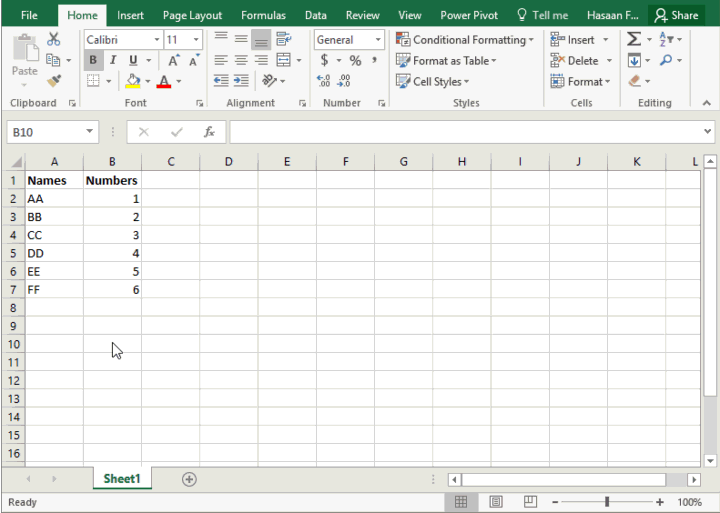
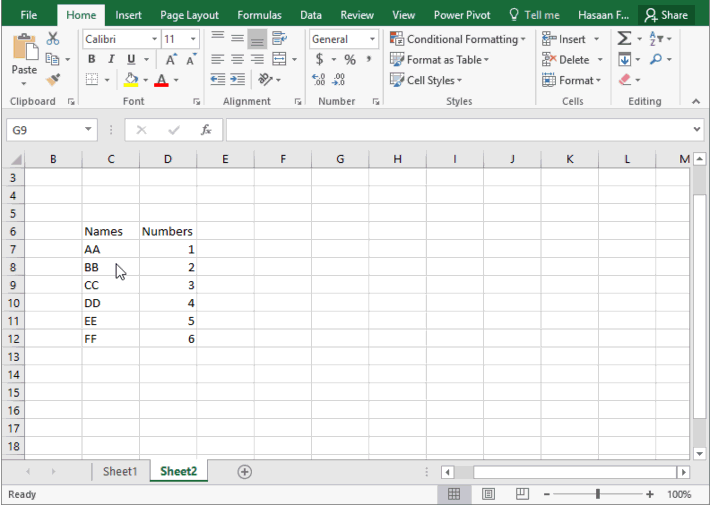
Suppose our data is based on 2 columns A and B and 7 rows from 1 to 7.
The data of column A has address like A1, A2, A3,…. A7. In this A is constant whereas due to additional rows we have increasing numbers from 1 to 7. If you understand up to this, you will understand what we are about to learn.
Lets say you want to put the transposed data starting at cell C10. I will put this formula in cell C10 and press Enter key:
=INDIRECT(“A”&COLUMN()-2)
And this formula in C11 and press Enter:
=INDIRECT(“B”&COLUMN()-2)
Now select these two cells and drag the fill handle across to column I. So there you have the data transposed. But lets understand what formula is actually doing.
So with the column function we were able to incremental numbers as we drag the formula across columns. But as we inserted the formula in third column and the not first column so it would have returned 3 in which case the first address to be fetched would have been A3. But we want the values from first cell of column A therefore we had to insert “-2”. This way we got 1, 2, 3 and not 3, 4, 5
So the formula: =INDIRECT(“A”&COLUMN()-2)
In the above formula “A” is provided as text string which is joined (concatenated) using “&” with the values generated through COLUMN function. And thus successfully built the cell references.
Now if you change the values in source range the transposed range will also change. But it is much more flexible as it won’t break if you change one item in transposed range manually.
Transpose – Rows to Columns using INDIRECT
Using the same technique learnt above, we can transpose the data from rows to columns. But in this case you will use ROWS() function instead of COLUMNS to work correctly.
As you are converting rows to columns therefore you will be going down the rows and thus you require number increments as rows are jumped. So simply adjust the formula as per your needs and use ROW instead of COLUMN and it will do the rest for you.
No you can’t simply replace the COLUMN function with ROW function as mentioned above to convert the rows back to columns. Instead you will have to use the combination of INDIRECT, ADDRESS and ROW function.
In my case to transpose first row to column I used the formula: =INDIRECT(ADDRESS(10,ROW()-11))
Whereas to convert the second row to column I used this formula: =INDIRECT(ADDRESS(11,ROW()-11))

Method 4: TRANSPOSE using INDEX functions
Using the technique learnt to transpose columns to rows above. You can use INDEX function if building reference is difficult for you and you still have your head spinning.
INDEX function is one great addition to Excel functions and formulas repository. Lets have a look at the syntax of INDEX very briefly so that we understand how can we use it to transpose the data.
INDEX(array, row_num, [column_num])
array: the range, in our case it is the range we want to transpose
row_num: the row number. In this function we have mention row number to help it fetch the value
[column_num]: this is the optional argument. If not mentioned the column number doesn’t change and it will be the same in which function is applied. But today we need this option badly!
Transposing Rows to Columns using INDEX function
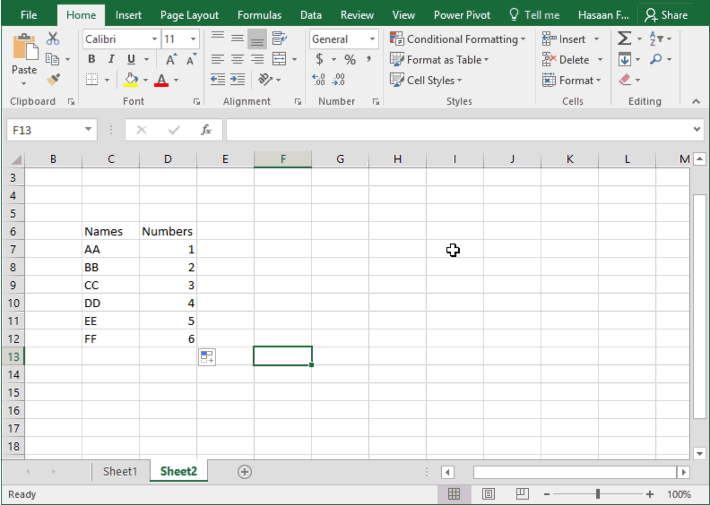
Suppose our data is arranged from cell A1 to G2. Two rows and seven columns in other words. So if we transpose the data we will have 2 columns and 7 rows.
To transpose the data arranged in a row to column go to the cell from where you want the data to start. I selected cell C6 and D6 and put theses formula:
Cell C6: =INDEX($A$1:$G$2,1,ROW()-5)
Cell D6: =INDEX($A$1:$G$2,2,ROW()-5)
Select both cells and drag the fill handle down to next six rows i.e. row 12. And you will get the data transposed from rows to columns.

=INDEX($A$1:$G$2,1,ROW()-5)
array: [$A$1:$G$2] – this is the range that we want to transpose. The reference is made absolute so that as we drag the formula this array stays static and does not change.
row_num: [1] – this represent the first row of the data and we mentioned it so that INDEX function recognize that we want it to fetch the values only from row 1 of selected array i.e. $A$1:$G$2.
column_num: [ROW()-5] – Our data A, B, C, … G is in one row but across 7 columns. That means the address of:
- value A is first row-first column
- value B is first row-second column
- value C is first row-third column; and so on…
So as we drag the formula down, we want the formula to get the values from 1st, 2nd, 3rd, 4th, 5th, 6th and 7th column. To do this we have to tell the column number. Now one way is to mention column number manually every time we put the INDEX function in next cell so that it fetches the right value.
But to automate the process of feeding column numbers to the function, I used ROW() function as the argument of column number (column_num). And as I drag the fill handle down, the ROW function will churn out row numbers inside the formula.
ROW function gives the row number. Now as I have put the INDEX function cell C6 the ROW function will tell that ROW number is 6. But we want it to be 1 as I want to fetch the values from the first column of the selected array. That is the reason we have “-5” following ROW() inside the formula. So it reduces the numbers generated by ROW function by 5 and this it will give 1, 2, 3, … 7.
Transposing Columns to Rows using INDEX function
Once you understand how INDEX function has fetched the values in above situation. Its easy to understand how to tackle the data which is arranged in columnar form and we want it to shift in rows.
For this we will make two changes:
for row_num: now we will use COLUMN() function generate numbers so that as we drag the formula towards right the row number will get updated because we are jumping across columns and thus COLUMN function will fetch the column number. Adjust the value generated by column number by adding or subtracting constants so that you get the desired result.
for column_num: mention 1 or 2 depending on the column within the selected array from which you want the values fetched.
Example
For example my data is based in 2 columns 7 rows and is housed in column C and D starting at Row 6.
I want the data transposed in rows 13 and 14 in column F. Therefore I put these formula:
cell F13:
=INDEX($C$6:$D$12,COLUMN()-5,1)
cell F14:
=INDEX($C$6:$D$12,COLUMN()-5,2)
Select both cells and drag to the right until column L
Method 5: Paste Special + Common Sense = Paste Ultimate!
We saw TRANSPOSE function went ahead of Paste Special as it was not only able push columns as rows (transpose) but were also live as transposed range was able to update as source change. We fixed some of the TRANSPOSE nuisances through INDIRECT approach. But writing formula and then dragging the range takes time.
But can we get TRANSPOSE like result using paste special? The answer is yes!
However, for unknown reasons, if you try to transpose and paste link at the same time Excel does not allow that i.e. you can either transpose or paste link. In other words, if you click Paste Link button with transpose option checked, the moment you select transpose option the paste link button gets disabled.
To get around this misery we took help of our Agent-X named common sense. Follow along!
Step 1: Copy the range and go to any vacant space in the same worksheet.
Step 2: Hit Alt+Ctrl+V to invoke paste special dialogue box and hit the button paste link. This will paste NOT the cell values but the cell references of the range you copied.
Step 3: Select the range you just pasted and hit Ctrl+H. This will bring up the REPLACE dialogue.
Step 4: In ‘Find what’ field mention equal sign i.e. “=” (without quotes) and in replace with field mention “HS=” and hit Replace ALL button. This will actually convert the formula into text as you have just replaced the equal sign with HS=
Step 5: Copy the range again and now go to the place where you want to put the transposed range. Hit Alt+Ctrl+V to bring the paste special dialogue box. Select the Transpose option and click OK. This will effectively transpose the data.
Step 6: To revert the formulas back in place so that you get the correct values in place from the source range. Hit Ctrl+H again. This time in Find what field put HS= and in replace with mention =. Hit Replace ALL button.
Now you have the live-transposed-range of the source WITHOUT using TRANSPOSE function or similar alternatives. How cheeky was that! 😉
So how do you do the transpose? If you have new ideas or any better versions of the ideas discussed do let me know in the comment section
Hi = i have used the OFFSET function to transpose data often, although I think I prefer the INDEX option explained above. So if I’m converting columns to rows, I will just fix the cell the formula starts from and then say move one row down for each cell.
Great, Excellent
How to do this with VBA?
This is fantastic!
You can’t imagine the help you give to other people, especially a novice like me. Many thanks. Tom
Hello,
i am trying to convert/transpose multiple rows with unique code into different columns.
Can you help with a formula to solve this problem without using manual method
Thank you in advance
Regards
Folabi
sample initial data
Branch Code Terminal ID Total Count
10 10320101 8,212
10 10320102 6,196
10 10320103 8,099
10 10320104 6,217
11 10320111 1,180
11 10320112 7,727
12 10320121 296
12 10320122 7,584
12 10320123 7,270
13 10320131 7,888
13 10320132 5,607
13 10320133 6,464
14 10320141 9,650
14 10320142 8,547
14 10320143 230
15 10320151 7,806
15 10320152 8,230
To have a table to look like this
Branch Code Transaction count – Terminal 1 Transaction count – Terminal 2 Transaction count – Terminal 3 Transaction count – Terminal 4
10 8,212 6,196 8,099 6,217
11 1,180 7,727
12 296 7,584 7,270
13 7,888 5,607 6,464
14 9,650 8,547 230
15 7,806 8,230
Dear Hasan,
i have data like below there are 10,000 lines
A
1003
1006
1008
1007
1009
B
1234
456
and i want to convert the data as below.
A 1003 1006 1008 1007 1009
B 1234 456
Please help me out.
Regards,
Sai
Hi,
I have a spreadsheet as well to transpose, but every 14 lines I need the data to start filling again in column
Here is the data to transpose:
Santa Ana Kiosk Mobile Not present
Orange Kiosk Mobile In repair
Irvine Kiosk Mobile In service
Santa Ana Kiosk Software V2
Orange Kiosk Software V3
Irvine Kiosk Software V1
and I want it to end up looking like this..
Santa Ana Orange Irvine
Kiosk Kiosk Kiosk
Mobile Mobile Mobile
Not present In repair In service
Kiosk Kiosk Kiosk
Software Software Software
V2 V3 V1
So every 4th row the formula needs to restart, or I would end up with a long horizontal string of data, which would be just as bad as the current long vertical string of data….
any ideas?
Thanks
Just use method 5 and copy the formulas over to the side where you want them every 4th row
Hi. Thanks very much for this, it is exactly what I needed. Only difference though is that I need to transpose multiple consecutive rows into multiple consecutive columns on a different sheet but keeping links. I can do it one by one using Transpose function but I’ve got about 70 rows. Your article has help me how to do these in an array but you explain it if it’s in the same sheet, how can I do it if it is in a different sheet please? Thank you
Using same formulas discussed just append sheet name followed by ! Mark before cell reference.
Say your sheet name is Nov17 and you want to refer to cell B2 of this sheet then it will be like this: Nov17!B2
Thanks so much. Now I understand how to transpose data to rows and column.
Hello Hasaan,
Thank you for your website. Great Learning in here.
I got a question want to ask about the Transpose – Rows to Columns using INDIRECT.
Can You explain what is the -11 use for? =INDIRECT(ADDRESS(10,ROW()-11))
as I want to link some data in column to row at another worksheet.
Thank You a lot
Vincent
Hello,
If I have data in a row in Sheet A, and I want to paste it into Sheet B, but shifted over a column, how do I achieve that? Every time I attempt it in a straightforward way, it just gives me the error that the copy area and paste arent the same size.
This works fine if i am doing it in the same sheet, I can put it wherever I want, but I get that error otherwise.
The goal here is to get a row from a sheet with a large amount of data onto a different sheet that has only the data i want, but with an additional blank column preceding the new data. Does that make sense?
Hello,
Hope i will get help. I have data like this
Prabu 1
Prabu 2
Prabu 3
Babu 1
Babu 2
I want to convert into like this
Prabu 1 2 3
Babu 1 2
Note: It is small record i can do transpose. But i have more then 10,000 lines. Pls help
Step 1: Use text to column to separate text from numbers
Step 2: Use pivot table this way: https://pakaccountants.com/wp-content/uploads/2017/08/transpose-pivot-table.jpg
Can anyone help me please,
i have data like this..
ABC: 100|100 200|200 300|300 and so on.
if i want to transpose then i need only one cell copied to paste somewhere in limited cells….what i need is actually i want to copy only one cell in a column. i also tried to hide one column but when paste then it shows the hide cells also….tell me how i can copy and paste the required cells only.
Please help me
I have data in excel as below
A 1 2 3 4
B 5 6 7 8
I want it like this
A
1
2
3
4
B
5
6
7
8
How can i transpose data from row to column other way round then excel does by default. Example, i need to transpose 1,2,3,4 row data into column as 4,3,2,1 not as 1,2,3,4. Many thanks in advance
How can we transpose multi columns to a single row?i.e i have data 1 to 5 from B2:F2
6 to 10 from B3:F3 , 11 to 15 from B4:F4 i want result in J2 Column 1,2,3,4,5,6,7,8,9,10,11,12,13,14,15.
i try to use transpose but not works fine any formula could you have?thanks
How can we transpose multi columns to a single row?i.e i have data 1 to 5 from B2:F2
6 to 10 from B3:F3 , 11 to 15 from B4:F4 i want result in J2 Column 1,2,3,4,5,6,7,8,9,10,11,12,13,14,15.
i try to use transpose but not works fine any formula could you have?thanks
Hello,
Can anyone please help me to transpose the data as below. I have huge number records to be converted like this. any help would be highly appreciated…
code1 Code2 1 2 3 4 5 6 7
W05 404616 32 38 95 75 74 85 57
W06 404616 19 49 56 65 68 54 54
code1 Code2
W05 404616 1 32
W05 404616 2 38
W05 404616 3 95
W05 404616 4 75
W05 404616 5 74
W05 404616 6 85
W05 404616 7 57
W06 404616 1 19
W06 404616 2 49
W06 404616 3 56
W06 404616 4 65
W06 404616 5 68
W06 404616 6 54
W06 404616 7 54
Hi can help me with this.
for example
a b c
1 1a 1a 1b 1b 1c 1c
2 2a 2a 2b 2b 2c 2c
will become
1 2
a 1a 1a 2a 2a
b 1b 1b 2b 2b
c 1c 1c 2c 2c
Hello Hasan
Hope you are doing well at outset accept my felicitation for the great help I tried lot of site but found the resolution at your site.
i tried the Transpose – Column to Row using INDIRECT formula you explained above and found it works well in the same sheet but what if we need it from different sheet i.e from sheet1 to sheet2 and one more thing in the same formula{=INDIRECT(“A”&COLUMN()-2)} could you explain why we are doing -2 whats the logic behind that?
Thanks and Regards
Thanks Avtar I am glad you found the solution here.
I am using INDIRECT formula to construct a reference which fetches the value from the resultant reference. As my original data is vertical (column wise) I want my data to be horizontal (row wise). So in original shape the column reference “A”/”B” remains constant as we go from top to bottom within the same column.
So while transposing I need A or B to be constant thats why I concatenated it inside INDIRECT function and then used COLUMN function to get incremental 1,2,3 and so on as I drag the fill handle to the right. So final output can be A1, A2, A3… or B1, B2 and B3…
-2 is used because I started from column C which is third column but I wanted the data to be fetched starting from column 1. So 3-2=1
To get the data from another sheet you just have make a little addition of ‘worksheet name’ before column reference inside INDIRECT function. Suppose the name of worksheet is “Factory” then formula will become:
=INDIRECT(“Factory!A”&COLUMN()-2)
Hi I would like to transpose a portion of a row into a column and then duplicate the remainder of the row to match. Example below
AB10 ABERDEEN S* 011 AB10 AB11 AB12 AB13 AB14 AB15 AB30 AB31 AB32
AB22 ABERDEEN N* 006 AB16 AB21 AB22 AB23 AB24 AB25
to
AB10 ABERDEEN S* 011 AB10
AB10 ABERDEEN S* 011 AB11
AB10 ABERDEEN S* 011 AB12
AB10 ABERDEEN S* 011 AB13
AB10 ABERDEEN S* 011 AB14
AB10 ABERDEEN S* 011 AB15
AB10 ABERDEEN S* 011 AB30
AB10 ABERDEEN S* 011 AB31
AB10 ABERDEEN S* 011 AB32
AB22 ABERDEEN N* 006 AB16
AB22 ABERDEEN N* 006 AB21
AB22 ABERDEEN N* 006 AB22
AB22 ABERDEEN N* 006 AB23
AB22 ABERDEEN N* 006 AB24
AB22 ABERDEEN N* 006 AB25
I have thousands of records to change and the rows are not consistent lengths (the part I need to duplicate is though)
Hi – did you determine how best to do this? I have the same problem.
Hello everyone,
I have data and all the data is in the separate column. Each column I want to transpose as row values. For example, all the column headings in one row as shown in below, however, one heading should consist only 7 values. First table shows the data what I have and the second table shows what I expect to after transposing. Can anyone help me?
Table 1
A B C
1 54 28.1
5 51 28.1
3 50 28.1
4 49 28.1
5 48 28.1
6 47 28.1
7 46 28
4 45 28.1
2 44 28.1
3 43 28.1
7 44 28.1
5 43 28.1
6 46 26.7
5 41 26
1 39 26.7
2 40 26.7
3 41 26.7
5 42 26.7
5 43 27
6 44 27
4 45 27
Table 2
A B C
1 5 3 4 5 6 7 54 51 50 49 48 47 46 28.1 28.1 28.1 28.1 28.1 28.1 28
4 2 3 7 5 6 5 45 44 43 44 43 46 41 28.1 28.1 28.1 28.1 28.1 26.7 26
1 2 3 4 5 5 4 39 40 41 42 43 44 45 26.7 26.7 26.7 26.7 27 27 27
I have data like this.
John Age 45
John Education Graduate
John Phone 344555
John Mail-id [email protected]
John zipcode 600304
John Height 160
Wayne Age 30
Wayne Education Post Graduate
Wayne Phone 567839
Wayne Mail-id [email protected]
Wayne zipcode 600405
Wayne Height 165
Neil Age 50
Neil Education Doctorate
Neil Phone 465780
Neil Mail-id [email protected]
Neil zipcode 657890
Neil Height 170
What I want is like this
Name Age Education Phone Mail-id zipcode Height
John 45 Graduate 344555 [email protected] 600304 160
Wayne 30 Post Graduate 567839 [email protected] 600405 165
Neil 50 Doctorate 465780 [email protected] 657890 170
Can you offer a solution
Check this tutorial please:
Pivot data using Power Query to show text values – Data Restructuring using Excel – How To
https://pakaccountants.com/data-restructuring-pivot-text-data-power-query-excel
Dear Team,
I hope you are having a good day.
I have question an excel spread sheet where they are multiple rows and column.
i want to transpose the whole row B and C as example :
Number s5 s10 s20 s25 s50 s100
88775232 10 10 6 2 5 0
89614654 60 50 0 0 0 5
I want to put this cells text into 3 columns in Organized way. Like below..
Item Qty Number
s5 10 88775232
s10 10 88775232
s20 6 88775232
s25 2 88775232
s50 5 88775232
s5 60 89614654
s10 50 89614654
s100 5 89614654
is there any formula to do it?
Any help would be highly appreciated…
The data you provided seems incomplete when compared to finished example you mentioned. Put up a file with sample data on google drive and share the link. It will be help better understand what you are requiring.
– Hasaan
I am sorry about your inconvenience about above data
This is link of sample data on google drive
https://drive.google.com/open?id=0B8iU_cOQz4KlSi11dFBYeTduVk0
https://drive.google.com/file/d/0B8iU_cOQz4KlSi11dFBYeTduVk0/view
Hi,
Is it possible to transpose paste from rows into columns, and also pushing the data in the below columns further down so that they are not deleted/replaced?
Many Thanks
Im not sure if its possible with transpose. But it is possible with fill handle while holding Shift key. Would love to know if there is any way.
——————————————————————————————————–
|First |Second |Third |Forth | |First |Class |2,500 |
——————————————————————————————————–
|Class 1 |Class 4 |Class 8 |Class 6 | |Second |Class 4 |3,600 |
——————————————————————————————————–
|2,500 |3,600 |1,000 |4,500 | |Third |Class 8 |1,000 |
——————————————————————————————————–
| | | | | |Forth |Class 6 |4,500 |
——————————————————————————————————–
|Fifth |Sixth |Seventh |Eighth | |Fifth |Class 3 |8,000 |
——————————————————————————————————–
|Class 3 |Class 3 |Class 5 |Class 2 | |Sixth |Class 3 |2,100 |
——————————————————————————————————–
|8,000 |2,100 |1,600 |5,200 | |Seventh |Class 5 |1,600 |
——————————————————————————————————–
| | | | | |Eighth |Class 2 |5,200 |
——————————————————————————————————–
|Ninth |Tenth |Eleventh |Twelfth | |Ninth |Class 4 |1,000 |
——————————————————————————————————–
|Class 4 |Class 1 |Class 3 |Class 2 | |Tenth |Class 1 |1,200 |
——————————————————————————————————–
|1,000 |1,200 |4,800 |6,300 | |Eleventh|Class 3 |4,800 |
——————————————————————————————————–
| | | | | | Twelfth |Class 2 |6,300 |
——————————————————————————————————–
First/Second/Third/Forth : First/Class 1/2,500
Class 1/Class 4/Class 8/Class 6 : Second/Class 4/3,600
2,500/3,600/1,000/4,500 : Third/Class 8/1,000
: Forth/Class 6/4,500
Fifth/Sixth/Seventh/Eighth : Fifth /Class 3/8,000
Class 3/Class 3/Class 5/Class 2 : Sixth /Class 3/2,100
8,000/2,100/1,600/5,200 : Seventh/Class 5/1,600
: Eighth/Class 2/5,200
Ninth /Tenth/Eleventh/Twelfth : Ninth/Class 4/1,000
Class 4/Class 1/Class 3/Class 2 : Tenth/Class 1/1,200
1,000/1,200/4,800/6,300 : Eleventh/Class 3/4,800
:Twelfth/Class 2/6,300
Sorry, it should be looks like that, the / is denotes to separate each data in a cell.
First Second Third Forth First Class 1 2,500
Class 1 Class 4 Class 8 Class 6 Second Class 4 3,600
2,500 3,600 1,000 4,500 Third Class 8 1,000
Forth Class 6 4,500
Fifth Sixth Seventh Eighth Fifth Class 3 8,000
Class 3 Class 3 Class 5 Class 2 Sixth Class 3 2,100
8,000 2,100 1,600 5,200 Seventh Class 5 1,600
Eighth Class 2 5,200
Ninth Tenth Eleventh Twelfth Ninth Class 4 1,000
Class 4 Class 1 Class 3 Class 2 Tenth Class 1 1,200
1,000 1,200 4,800 6,300 Eleventh Class 3 4,800
Twelfth Class 2 6,300
Dear sir, Could you please help to solve with a function or formula to let the data at the left hand side is evenly in row by row to change in column’s form just like the right hand side?
Thank you very much.
First Second Third Forth First Class 1 2,500
Class 1 Class 4 Class 8 Class 6 Second Class 4 3,600
2,500 3,600 1,000 4,500 Third Class 8 1,000
Forth Class 6 4,500
Fifth Sixth Seventh Eighth Fifth Class 3 8,000
Class 3 Class 3 Class 5 Class 2 Sixth Class 3 2,100
8,000 2,100 1,600 5,200 Seventh Class 5 1,600
Eighth Class 2 5,200
Ninth Tenth Eleventh Twelfth Ninth Class 4 1,000
Class 4 Class 1 Class 3 Class 2 Tenth Class 1 1,200
1,000 1,200 4,800 6,300 Eleventh Class 3 4,800
Twelfth Class 2 6,300
Dear sir, could you please help to think the formula that I can change the data in row by row at the left hand side to the same data but in column to column, just like the right hand side.
Thank you very much.
Helpful article . I learned a lot from the information.
I need help. Suppose I have the below data in sheet 1:
10
20
30
40
50
60
The above numbers are in one column and in adjacent rows
I would want to use a formula in order to get the below result in the same sheet or another sheet:
20 40 60
The above result does not contain any cells in between the numbers.
Could you please help?
Hey Ace,
Thanks for stopping by and posting a question.
The way I understood is that you have you a data 10,20 and so in column A starting from cell A1 which extends to A6.
Now you want to transpose the data but also skip one cell so that you get just 20 40 and 60. For that one way is using the following formula:
=INDIRECT(“A”&COLUMN()*2)
in cell A8 and dragging the fill handle three cells to the right.
Hope this helps.
– Hasaan
Cell
A1 DYNACORE FITNESS LLC
A2 % TERESA MIDDLETON
A3 915 SW RIMROCK STE 201-110
A4 REDMOND, OR 97756
A5
A6 Name of employee
A7 1052 COLUMBIA LLC
A8 1423 NE 6TH AVE
A9 CAMAS, WA 98607
I want to put this cells text into 4 columns in Organized way. Like below..
DYNACORE FITNESS LLC %TERESA MIDDLETON 915SW RIMROCK STE 201-110 REDMOND
1052 COLUMBIA LLC 1423 NE 6TH AVE CAMAS, WA 98607
is there any formula to do it? any help would be highly appreciated…
You can use good ol’ CONCATENATE function for that or use its shorter form “&” to get this done.
I can see you need two lines so you can following formulas in two rows like this:
=A1&” “&A2&” “&A3&” “&A4
=A6&” “&A7&” “&A8&” “&A9
Let me know if it helped. Thank you for visiting and commenting
Dear Team,
hope you are having a good day.
my question may look simple but i need you help on this.
i have an excel spread sheet where they are multiple rows and column.
i want to tranpose the whole column E as a new row, keeping the data of Column A-D as it is.
sno name given name asset number type LCD Type of LCD
1 John 12345 87654 PC 56732 Monitor
2 mark 12346 87653 Laptop 56731 Monitor
3 james 12347 87651 laptop 56722 Monitor
4 august 12348 87652 PC 56733 Monitor
5 grey 12349 87659 PC 56781 Monitor
requirement is to move LCD and type of LCD to a new row keeping the user details same
So you just need to transpose only one column E? And keep the rest of the data the same way? Its like making only one column to a row and keeping the rest as columns? Upload the example image/file on google drive and share the link here so that I can help better. Thanks for asking!
I’m needing some help as I can’t get these functions to work with my issue.
I’m wanting to create a formula then transpose it.
IE
=Sheet1!E1&Sheet1!E2
=Sheet1!F1&Sheet1!F2
I did the formula in one cell the dragged right to get exactly what I wanted. Unfortunately, I can get these formulas to transpose properly to a column to make it useful.
I found a solution to my issue. While dragging the formula to the right works then transposing to be vertical didn’t result in what I needed. This was obvious my issue.
Before dragging the formula horizontally I changed the formula
=Sheet1!E1&Sheet1!E$2
=Sheet1!F1&Sheet1!F$2
This resulted in the transpose working properly when rotating to vertical.
Hey thanks for the follow up message. Read your messages late. Good to hear that you resolved while experimenting! Excellent
Hello,
I’m trying to apply INDIRECT for transposing a formulas, as you wrote that : “…simply adjust the formula as per your needs and use ROWS instead of COLUMNS and it will do the rest for you.” but it’s not working.
Can you help me with this problem and make an example.
Thank you in advance,
Kind regards,
Nemanja
Hey Nermanja,
Thank you for taking out time and visiting the website. Your question has actually sorted out a mistake. I have given the correct steps and have now included the animated illustrations as well to make the steps even clearer. Thank you for asking and helping me finding the mistake.
Hasaan