Although Excel is a spreadsheet but one of things it has borrowed from in-family word processor (Word) is Spell check feature. Excel uses the same kind of framework to find spelling mistakes in the worksheets. However, in excel things are not exactly same as normal word processor. In Excel you have to invoke spell check feature.
Calling in the Professor! – How to spell check in Excel
Contrary to usual expectations that there should be a button in ribbon inside Home Tab somewhere but it is not the case. To access spell check button click Review tab and the very first button at the left in Proofing group is Spelling.

You can also use shortcut F7 (function key) to initiate spell check process.
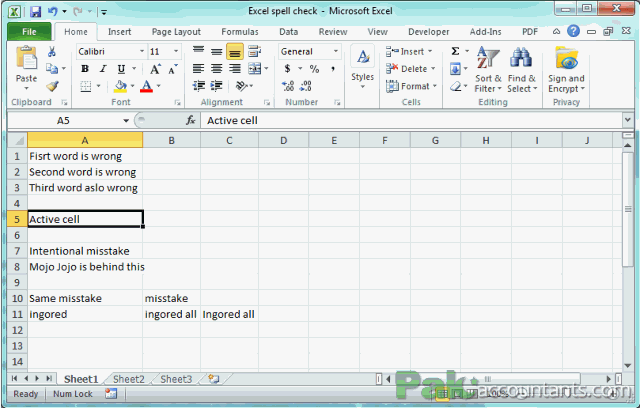
1. Check for spelling mistakes in entire worksheet
Step 1: Make sure you are not in edit mode. You can confirm this by looking at the excel’s status bar i.e. bottom left corner of excel’s window. If it says “Ready” its NOT in edit mode. If it says “Enter” then excel is in edit mode.

Step 2: Have a worksheet active the one you want to get checked. You can make worksheet active by clicking respective tab.

Step 3: You have two options:
Either go to Review Tab and click Spelling button
Or press F7 (function key) on the key board
Excel starts checking spelling mistakes. It checks for spelling from the active cell point and onward till the end of worksheet.
Step 4: If excel finds a mistake, excel will display spelling suggestions box from where you can select appropriate option:
- Ignore once: Ignore the current mistake in current spell check
- Ignore all: Ignore all the mistakes same as current mistakes in current spell check
- Add to Dictionary: Add the word to dictionary
- Change: Replace the current mistake with the selected suggestion
- Change all: Replace all the mistakes that are same as current mistakes with the selected suggestion
- Auto Correct: Let excel do the correction
If you want to stop the correction process right at this point click Cancel button.
Step 5: If the active cell (before spell checking is initiated) is other than A1 then excel once reached the end of worksheet will ask in a prompt dialogue if user wants to continue checking at the beginning of worksheet. User can select Yes or No.
2. Spell check one particular cell only
Step 1: Get in to edit mode.
- Navigate to that cell and press F2 key. OR
- You can simply double click on that cell with your mouse as well. OR
- You can click in formula bar after selecting the cell.
Step 2: Initiate spell check by clicking spelling button from ribbon above or pressing F7 key on the keyboard.
Step 3: If excel finds spelling mistakes it will display suggestions box otherwise a dialogue will appear “The spelling check is complete for cell text”

3. Spell check part of text
Step 1: Get into edit mode. Either by pressing F2 key or double clicking the cell that contains text
Step 2: Select the text you want to get checked for spelling mistakes. You can do so:
Either using mouse by holding left mouse button and dragging selection over text
Or Moving the cursor to the start or end of text. Press and Hold Shift key on the keyboard and press appropriate directional keys i.e. Arrow Up, Arrow Down, Arrow Left or Arrow right
Step 3: Initiate spell check either through ribbon or shortcut
Step 4: Follow the on screen instructions to complete the task

4. Spell check multiple cells in single worksheet
Step 1: Make sure you are not in edit mode in any cell. If you are then hit Escape key or click anywhere in excel to get out edit mode.
If the cells are together without any breaks or gaps in-between (contiguous data) then you simply do drag selection. You can also use shortcut for this. Press F8 once and use directional keys to make the selection.
Check out Top 10 Excel keyboards for Accountants to learn how F8 selection works
If the cells are far apart then Press and Hold Ctrl key on the keyboard and select the cells you want to get checked with your mouse. You can also use shortcut Shift+F8. Doing so you don’t have to hold down shift key if you have large number of cells to select.
Don’t miss our Selection article to learn 40+ excellent ways to make selection of data
Step 2: Start spelling check process from the ribbon or by using shortcut key F7
Step 3: Follow the on screen instructions.
Once the process runs its course successfully a dialogue box will appear mentioning that spell check is complete for selected cells

5. Spell check multiple cells on different worksheets
Step 1: Make sure edit mode is not active. If it is then press Escape key once.
Step 2: Select the cells on one worksheet either by holding down Ctrl key or using F8 or Shift+F8 key combination. Once done move to other worksheet where you have other cells to be selected. Make sure before you navigate away from current worksheet don’t press any keyboard or mouse button. Simply click the tab of the other worksheet
Step 3: Once next worksheet is active, repeat the process of selection using the technique you like i.e. Ctrl key or F8 or Shift+F8 as discussed above. Do the same if you have to select data from many worksheets.
Step 4: Press F7 to start spell check process.
Step 5: Follow the on screen instructions to complete the task

If you are paying attention watching above animation you will know that having data selected in one worksheet even if you move to another worksheet data stays selected. Awesome find 🙂
6. Spell check multiple worksheets at once
Step 1: Press and hold Ctrl key and click the worksheet tabs you want to get checked for spelling
Step 2: Initiate spelling check by pressing F7 key on the keyboard
Step 3: Follow the on screen instructions
Remember only the worksheets you selected will be checked for spelling mistakes and others will be ignored. If you like to get whole workbook checked then continue reading
7. Spell check all worksheets / whole workbook
Step 1: Right click on any worksheet’s tab and click “Select all sheets”
Step 2: Press F7 or click spelling check button from the ribbon under Review tab to start spell check process.
Step 3: Follow the on screen instructions to complete the task.

8. Spell check text joined with concatenate formula
In excel we can join text strings residing in different cells in one cell using concatenation formula. For example:
In cell A1 we have: “I watch cartooons all day”
In cell A2 we have: “My favurite cartoons are Doraemon”
In cell A3 we have: “I am 45 yaers old”
Go to cell A10.
You can join the contents of above three cells using any of the following methods:
=A1&” “&A2&” “&A3
=CONCATENATE(A1,” “,A2,” “,A3)
Now the cell that contains this formula does not contain the text but actually the value or result of formula. Therefore, excel cannot spell check such “text”. It can however go back to source cells that are combined but not the cell where text is appearing as one part.
Watch the following animation:

If you watch closely, once spell check is initiated it will ignore the text joined through formula and runs back to the beginning of worksheet to the source cells.
9. Spell check words in formula
As observed above excel cannot check the text that is joined by applying certain excel formula same way we cannot do spell check on text that is part of formula as it is inside the shell of formula and spell check does not have access there.
However, once you get in the edit mode and select the text that is part of formula then spell check does work. This works the same way as if we want to check part of text.
Following animation explains better

10. Excel’s proofing options
By now you must be thinking how excel pulls out this spelling functionality. Well its simple it does the same what we humans do. If we don’t remember spelling of any word we open up dictionary and look for that word. Same way excel has a dictionary available to it. And behind the scene it uses that dictionary.
Now it is simple to understand why sometimes excel cannot find the word even if it is correct. For example in the color can be spelled as colour. But colour is wrong as per Excel’s default US Dictionary. But this can be sorted by referring to correct dictionary. To do so we have to access Excel’s options.
Click File button > Options. In the excel options window on the left click proofing. And there you have the options you need.
You can change options here including the dictionary language to go around color and colour disorder :D.

- one workshet
- selected worksheet
- All worksheets at once
- one cell only
- part of text out of whole text string
- selected cells in single worksheet
- selected cells on multiple worksheets
- text joined using a formula
- text inside a formula
And lastly how to access proofing options in excel
really so nice.